Pressure washing is a highly effective method for deep cleaning various surfaces around your home. Whether you want to refresh your vinyl siding, remove grime from your deck, or revitalize your driveway, pressure washing can make a dramatic difference. However, to achieve the best results and avoid potential damage, it’s essential to pressure wash like a pro. Here are some expert tips to help you get started.
Step 1: Choose The Best Pressure Washer for the Job
The first step in pressure washing like a pro is selecting the right equipment for the task at hand. Different surfaces require different levels of pressure. For instance, vinyl siding can handle a gas pressure washer with a power range of 2,500-3,000 psi. On the other hand, aluminum, stucco, or soft-grain wood homes are better suited for a less powerful washer, typically around 1,200-1,500 psi. If you plan to pressure wash a wooden deck, exercise caution and follow specific instructions to prevent damage to the wood.
Step 2: Prepare the Area and Use Safety Gear
Before you start pressure washing, take the time to prepare the surrounding area. Remove any obstacles, such as furniture or plants, and cover nearby electrical outlets or delicate objects. It’s also crucial to wear appropriate safety gear, including goggles, gloves, and closed-toe shoes, to protect yourself from debris and water splatter.
Step 3: Set Up the Pressure Washer
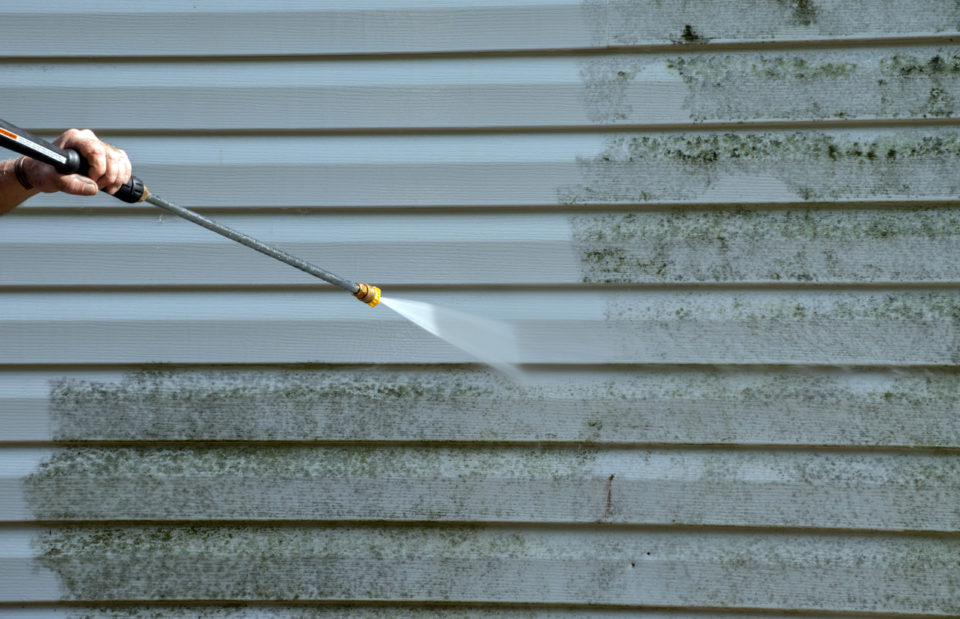
Begin by mixing water and a cleaning detergent with mildewcide in a 5-gallon water bucket, following the manufacturer’s recommendations. Then, attach your pressure washer to a garden hose and choose the appropriate nozzle for the job. Once you’ve selected the nozzle, connect it to the sprayer. To determine the optimal pressure, position yourself about three feet away from the surface you’re cleaning and test the pressure washer’s strength. Adjust your distance and spraying technique until you find the right balance between removing dirt and mildew without causing damage.
Step 4: Clean from the Bottom Up
When pressure washing, it’s crucial to work from the bottom up. Start at the base of the surface and gradually move upward in overlapping strokes. This technique prevents streaking and ensures thorough cleaning. Remember to maintain a consistent distance between the nozzle and the surface to maintain an even pressure and prevent uneven cleaning.
You might also like: Throw The Best Graduation Party
Step 5: Finish and Let It Dry
Once you’ve cleaned the entire surface, give it a final rinse from top to bottom to remove any remaining detergent. Afterward, allow the area to dry naturally. Avoid applying excessive pressure or using other methods to speed up the drying process, as this can lead to streaking or damage. With these tips in mind, you’ll be well-equipped to tackle any pressure-washing project with confidence.
Disclaimer: The stock image is being used for illustrative purposes only, and it is not a direct representation of the business, recipe, or activity listed. Any person depicted in the stock image is a model.